How to Set Up Memories Feature

Follow the below steps to configure the Memories feature:
  1. Click on Admin on the left menu bar and select Platform Setup.
  2. Scroll down to the Memories feature and click on Manage.

To Configure Memories for Long Service Celebrations, click on Configure LSA.

  1. The admin can activate or deactivate the feature from the activation button on the top-right corner of the page.
  2. The admin can auto-trigger Memories on each work anniversary or can select the milestone years.
  3. Further, he/she can select the users who should be getting the invites by selecting the user check boxes.
  4. Admin can also give rights to the reporting manager to send out invites to other colleagues.
  5. The first mail is triggered 30 days before the event date, followed by the reminder mail.

To Configure Memories for Birthdays, click on Configure Birthday.

  1. The admin can activate or deactivate the feature from the activation button on the top-right corner of the page.
  2. Select the users who should be getting the invites by selecting the user check boxes.

How to manage the Memories Feature

Admin can manage the Memories feature from the feature section in the platform.

  1. Go to Home and select the Memories feature.
  2. Click on the Actions button on the top-right corner and select Manage Memories.

Create a New Memory

  1. To create a new event, Click on the Create New Memory button in the manage section.
  2. Fill in the form with the event details and hit the Create button.

Manage Invitees/Review Submissions – Admin

  1. To manage invitees for an existing event, click on the three dots against the event. Select Manage Invitees.
  2. To delete the event, click on Delete.

Add Invitees/Review Submissions – Admin The admin can add more invitees for a particular event from the Manage Invitee section.

  1. Go the Manage Invitee section and click on the Add More Invitees button at the top.
  2. One can select individual users or do a bulk upload.
  3. To review user submissions, click on the three dots in the Actions column and select View.

Review Submissions – Admin

  1. The admin can either reject a particular submission by clicking on the Reject button or ask the user to resubmit the testimonial by selecting the Reject and Resubmit button.
  2. The Reject and Resubmit button triggers a mail to the user asking them to submit a new testimonial.
*We would recommend the admin to use the Reject and Resubmit button while rejecting a submission. This will send an email notification to the user about the rejection of their submission and give them a chance to resubmit a new testimonial.

Submit Testimonials -User

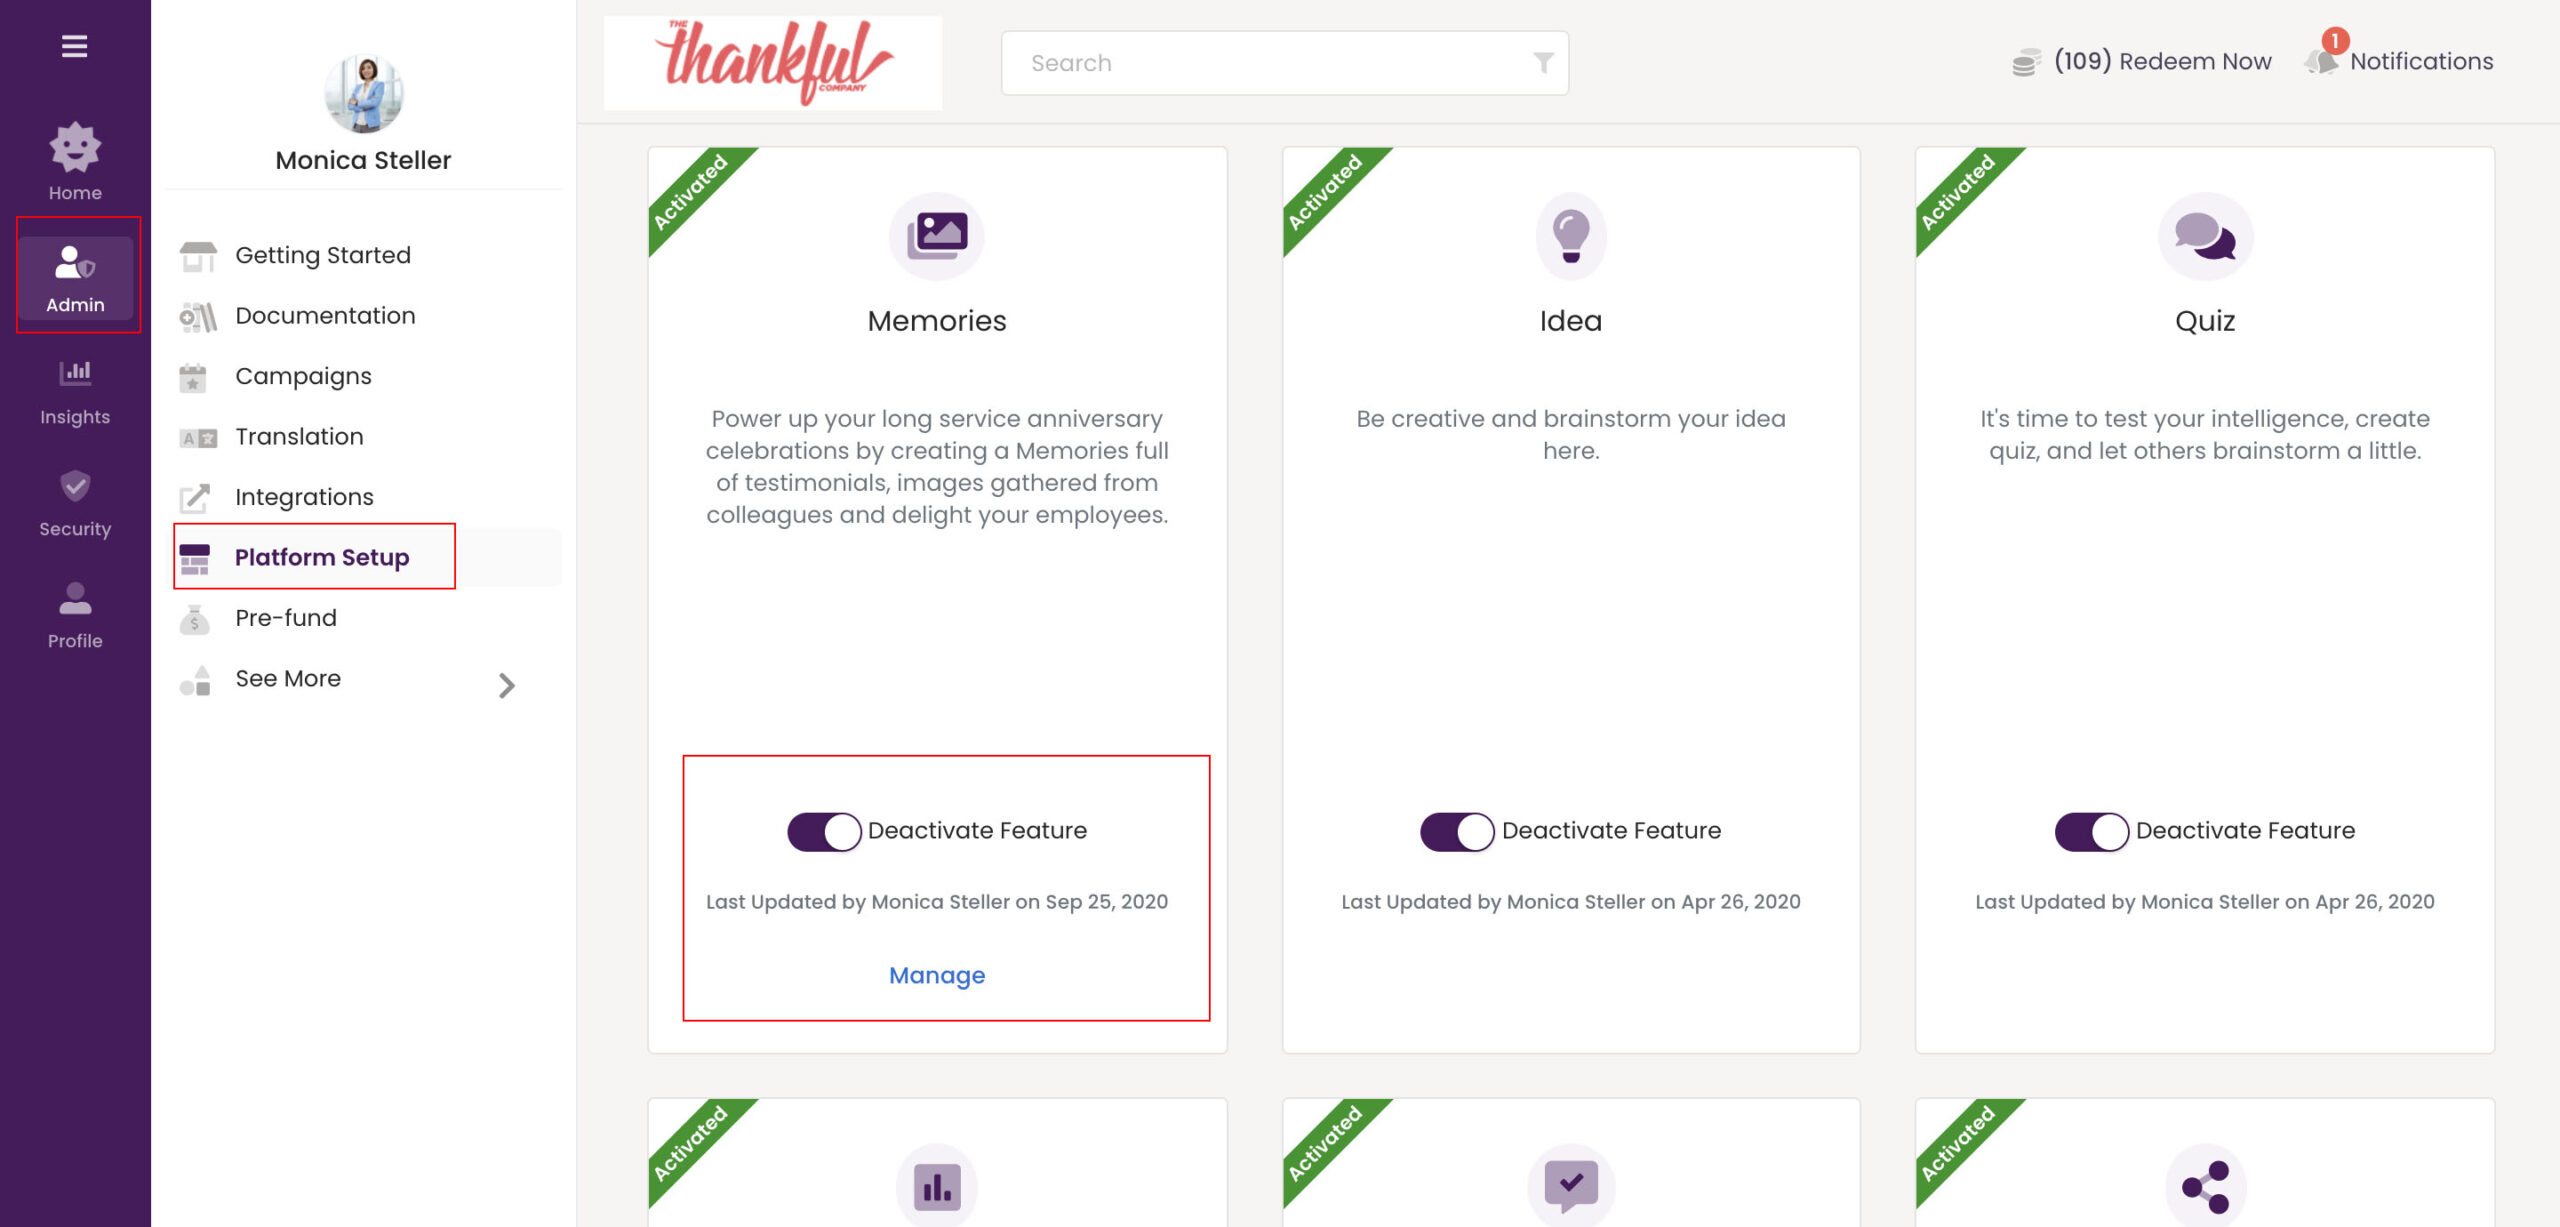
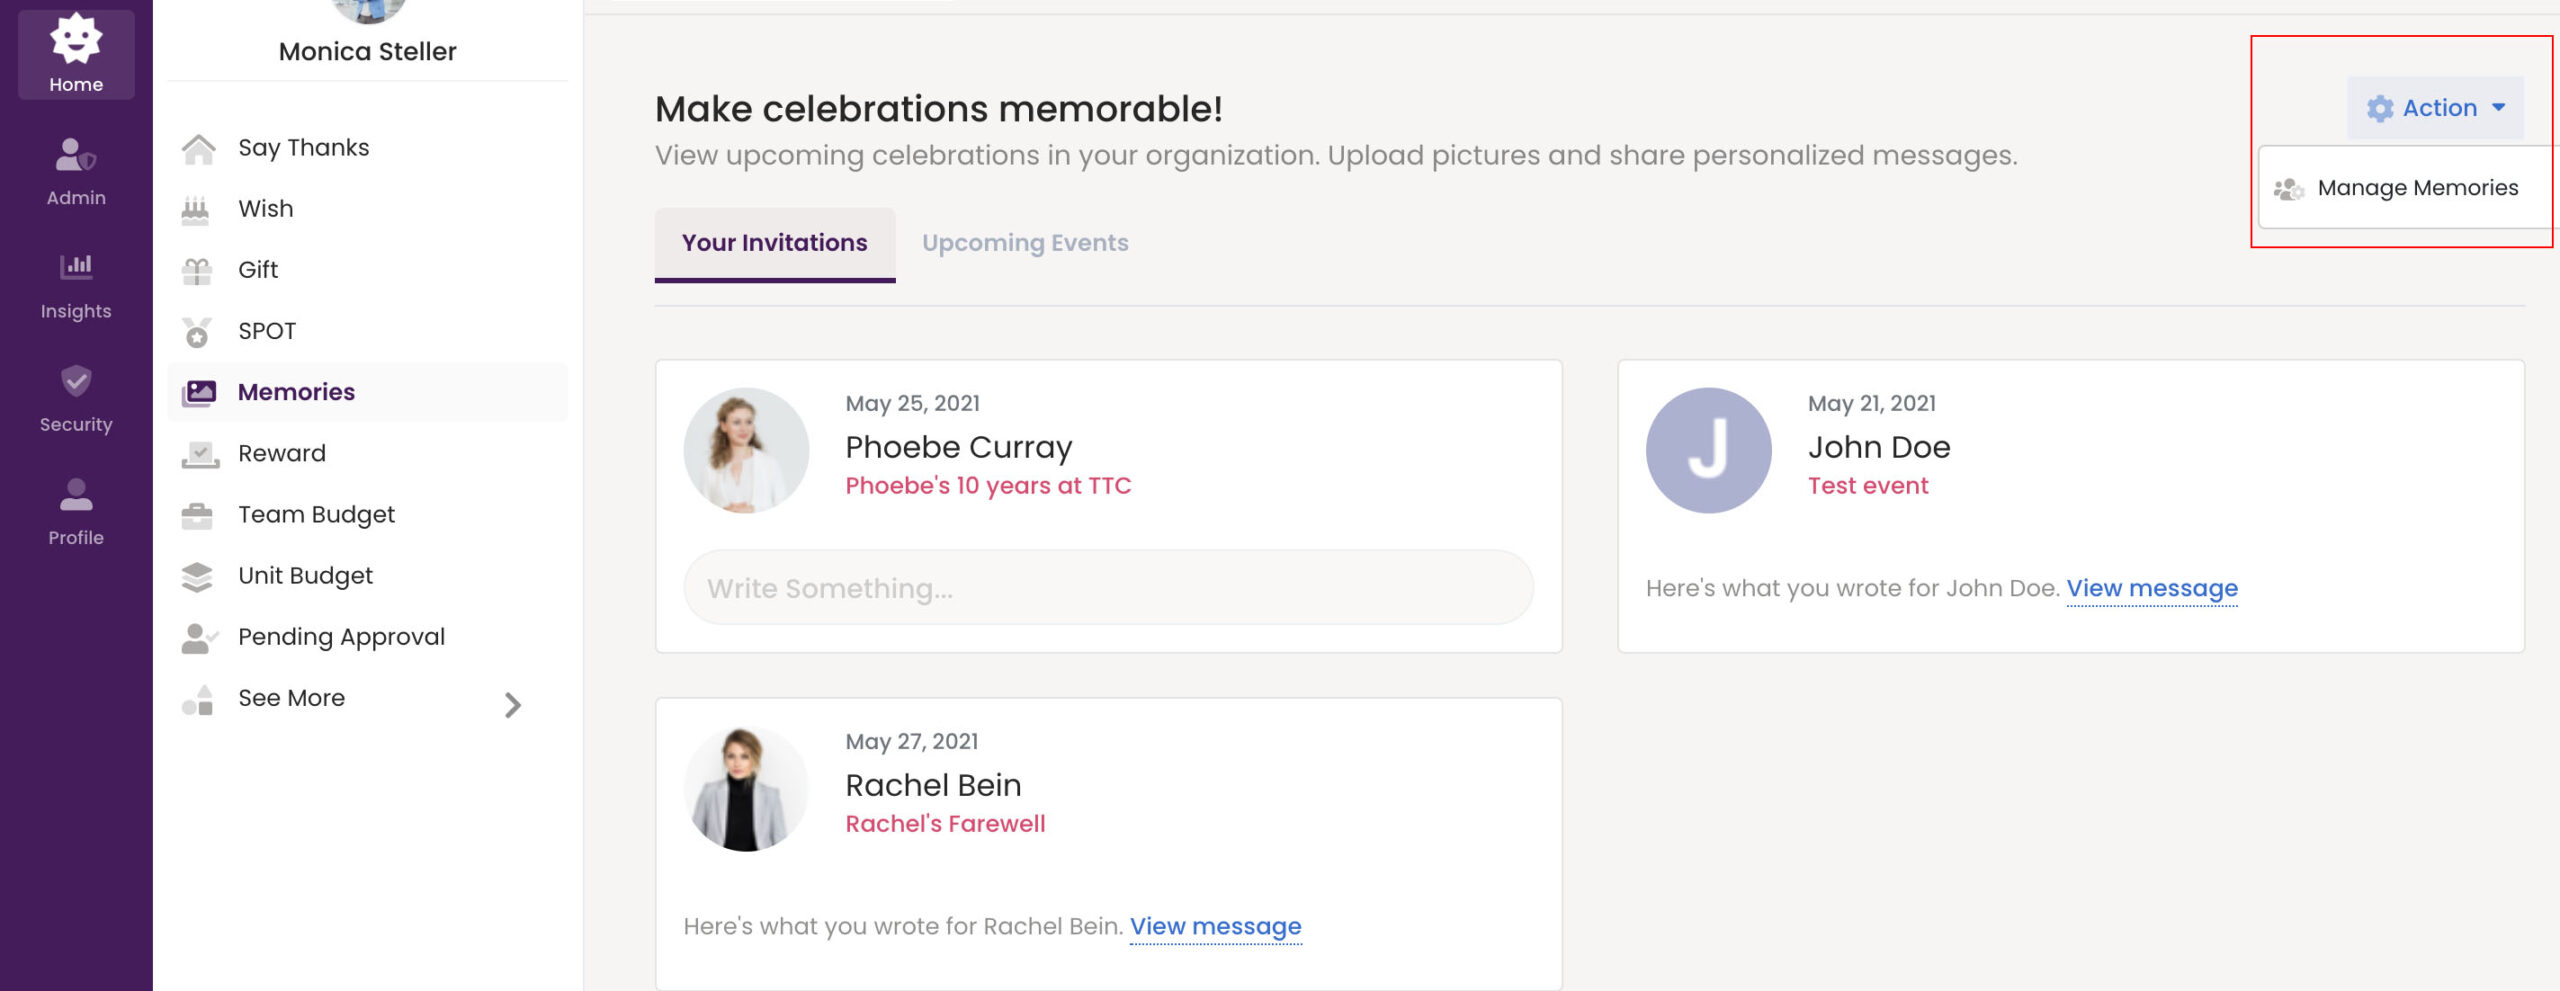
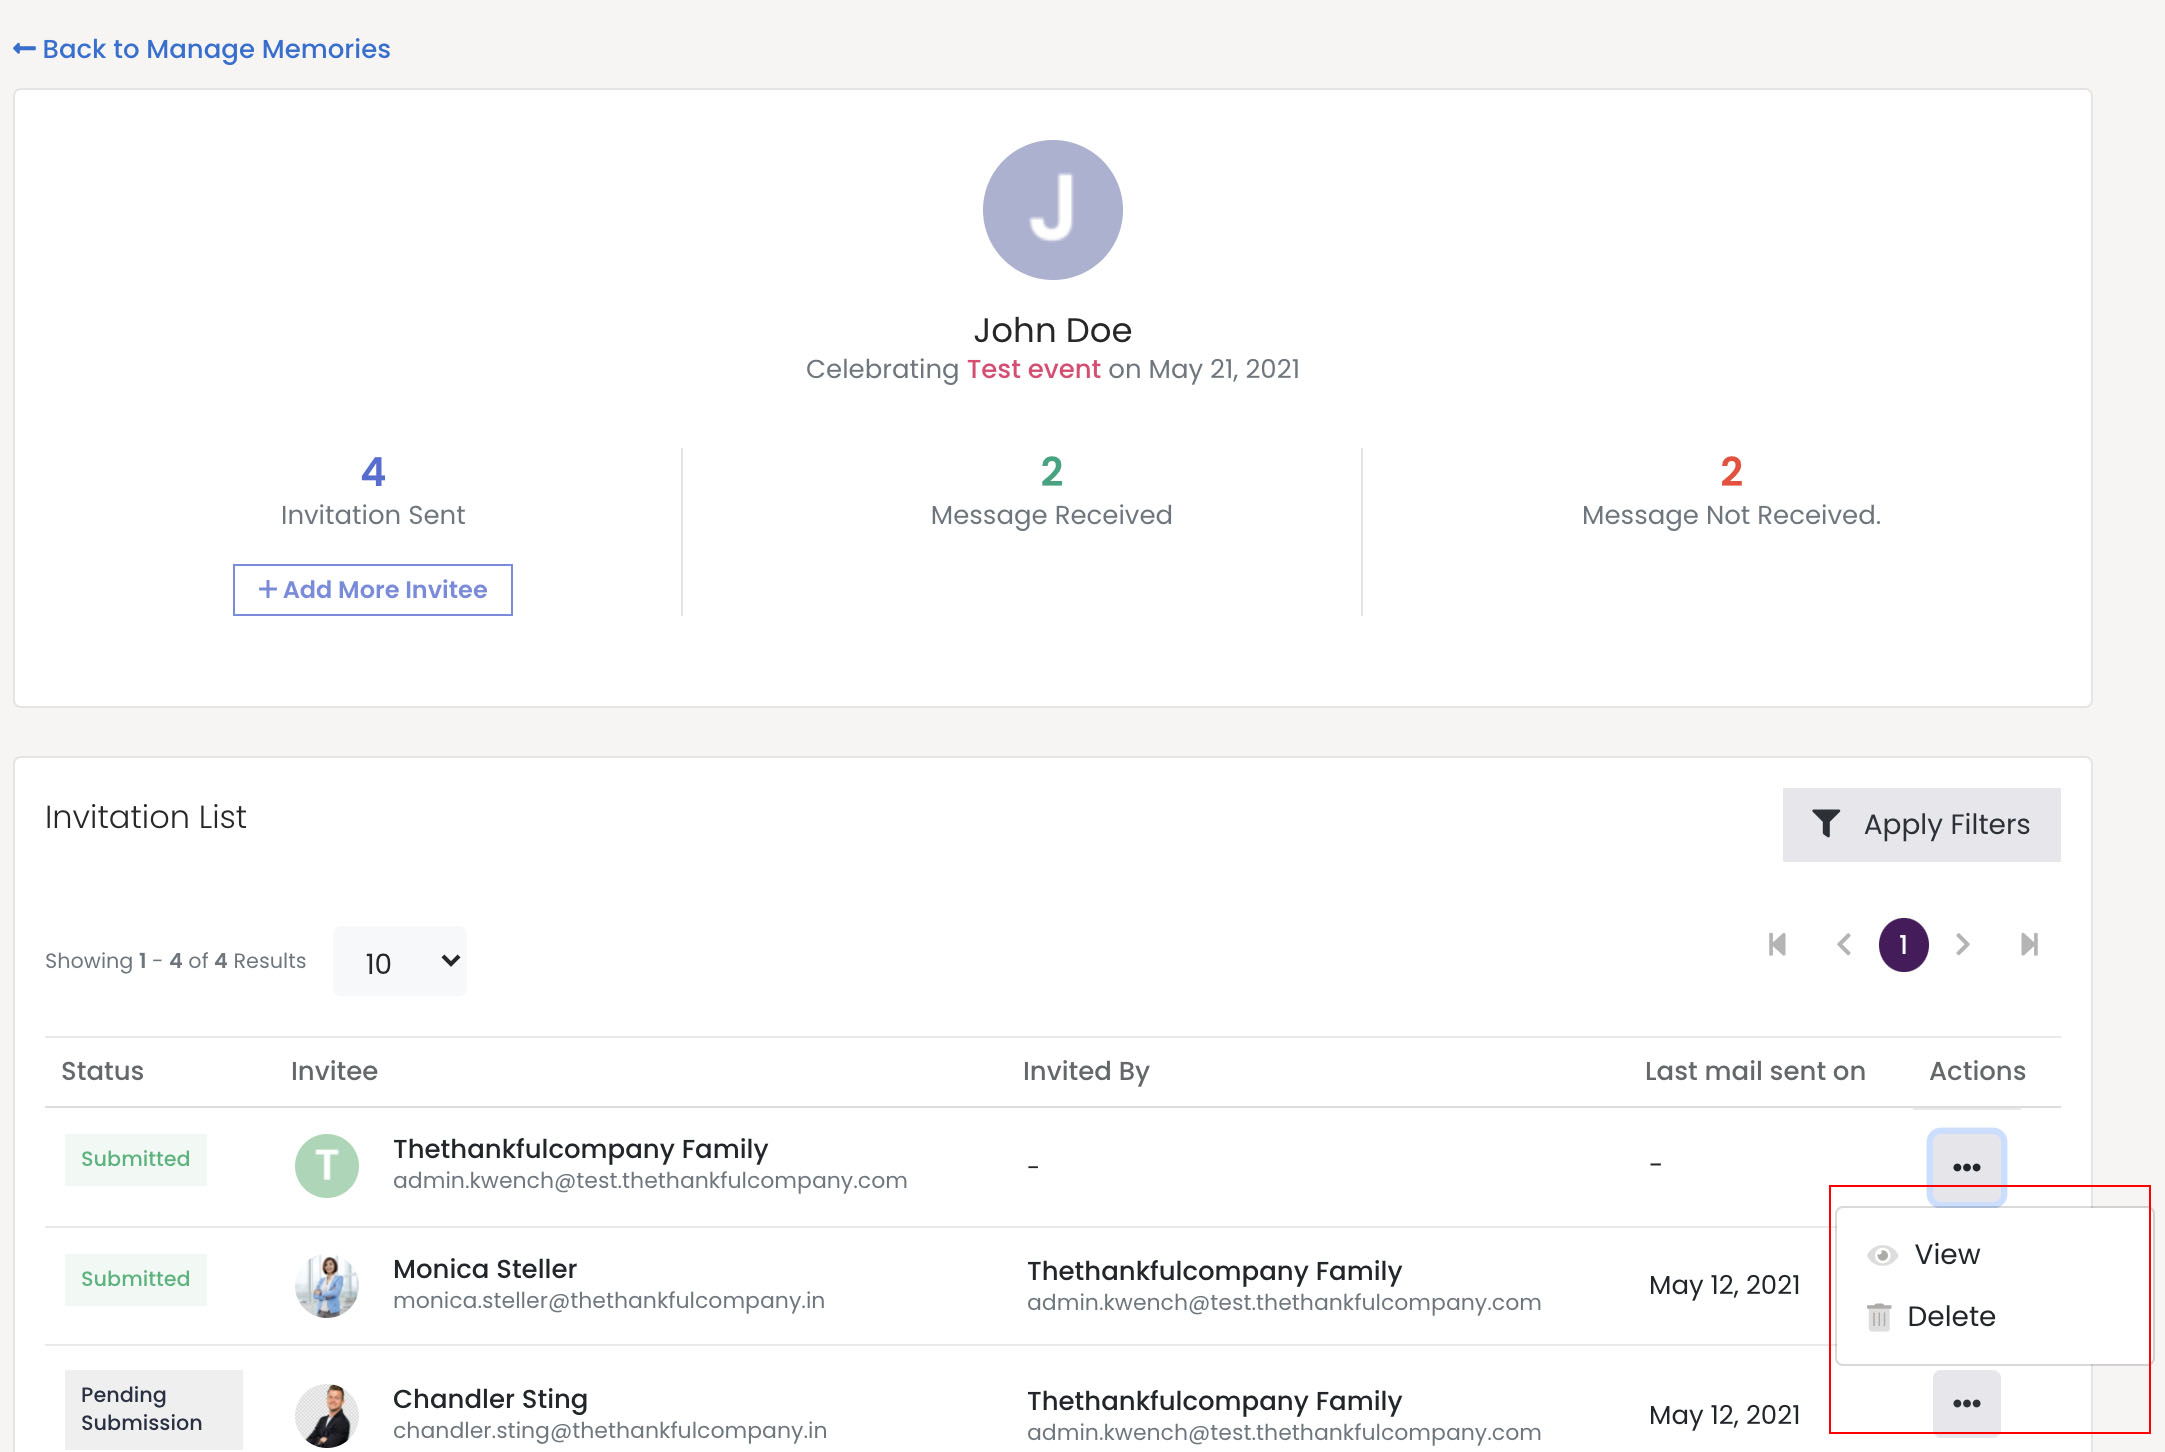
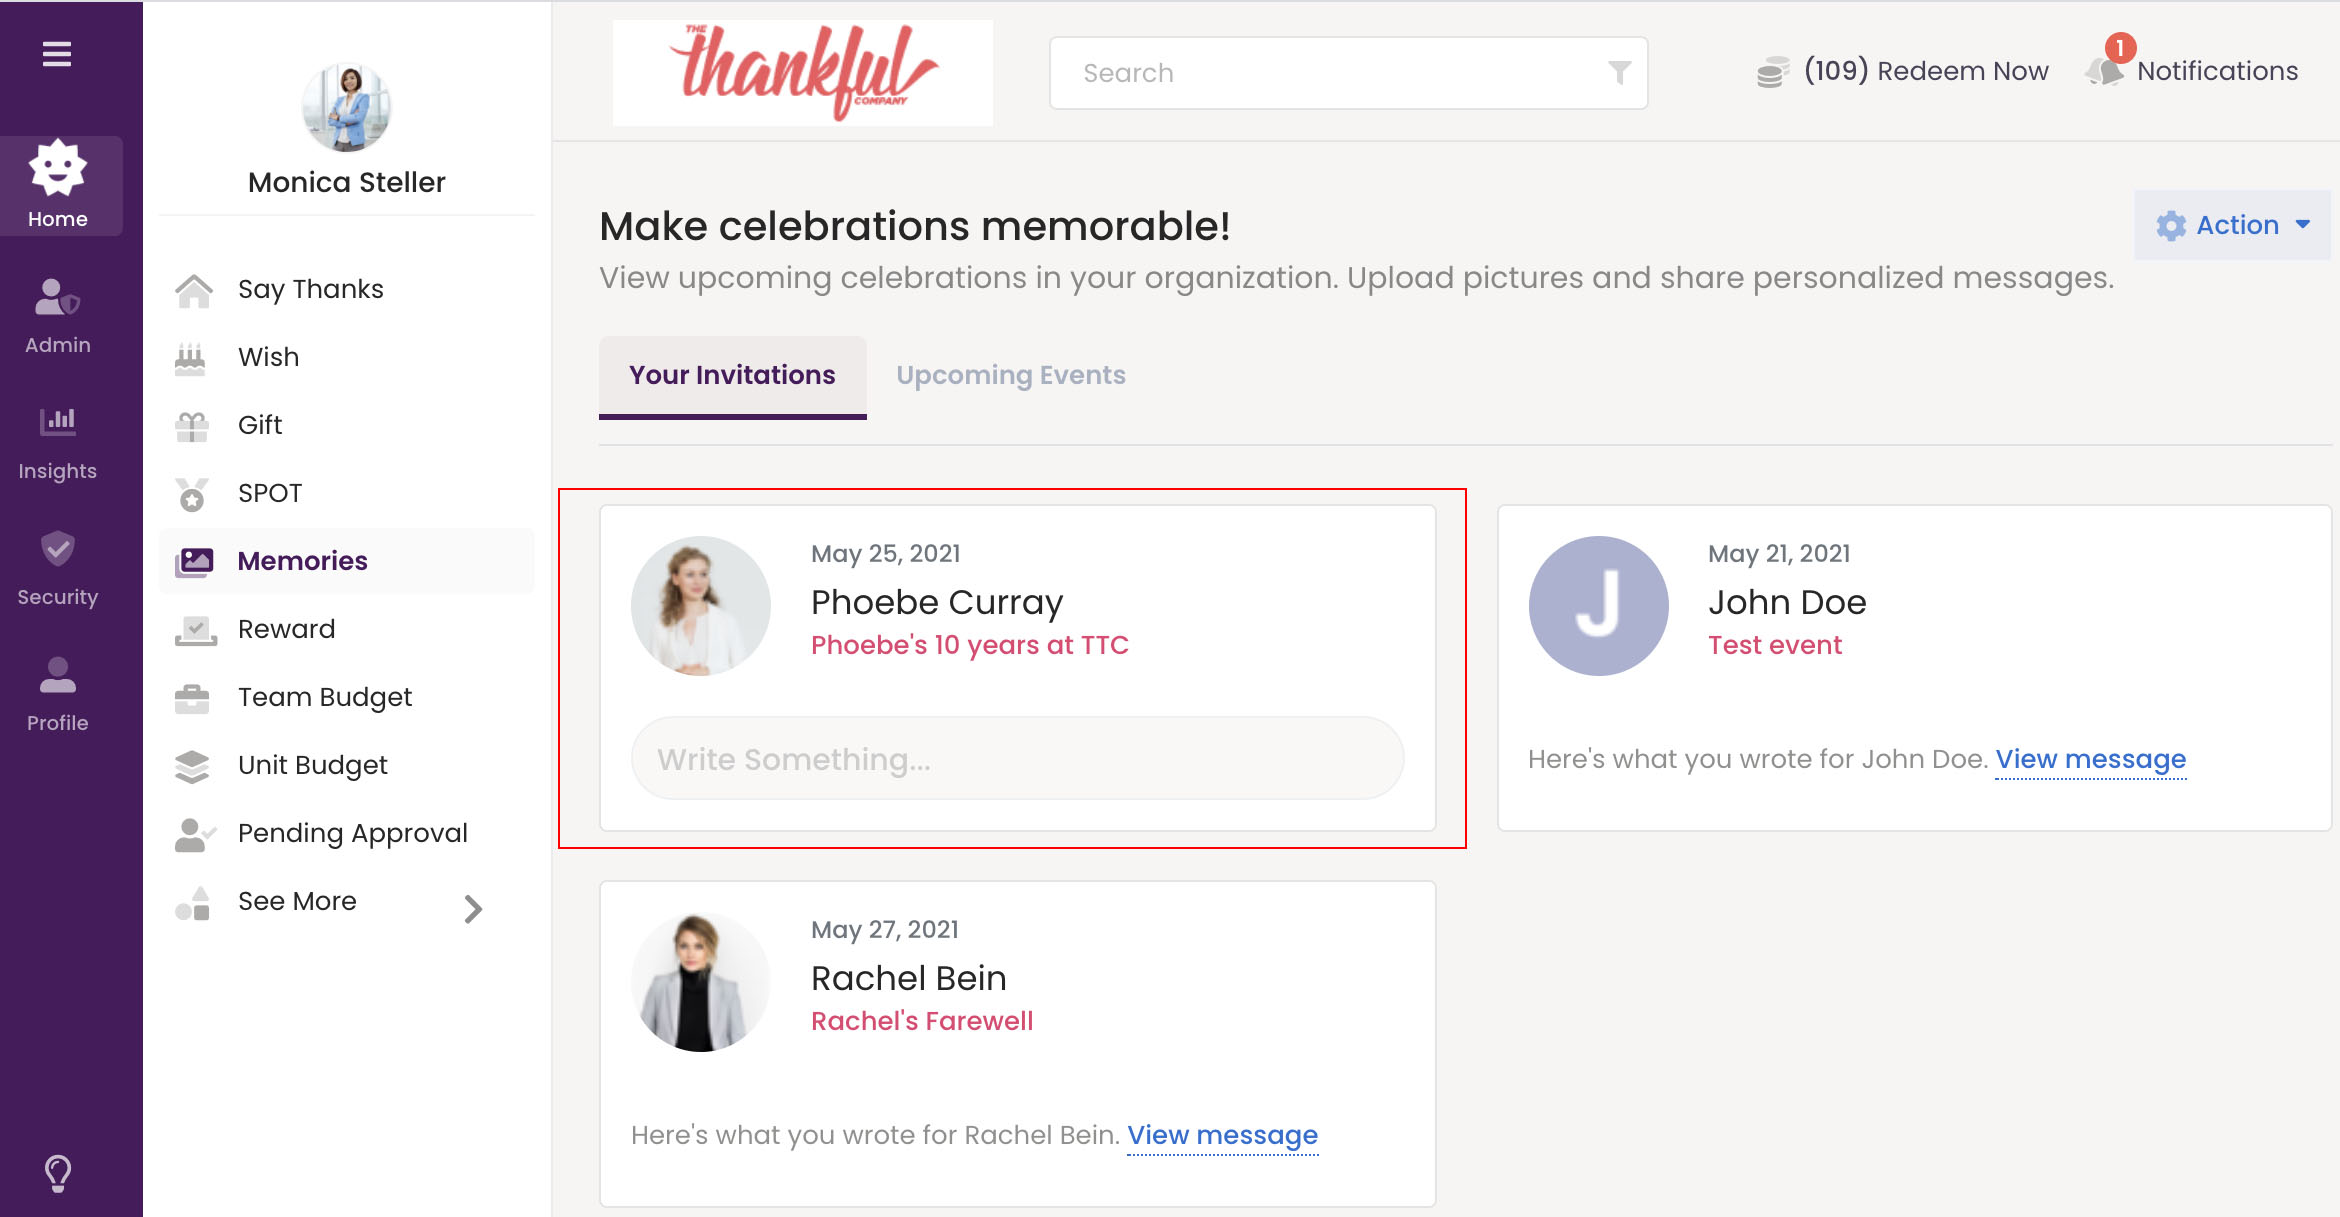
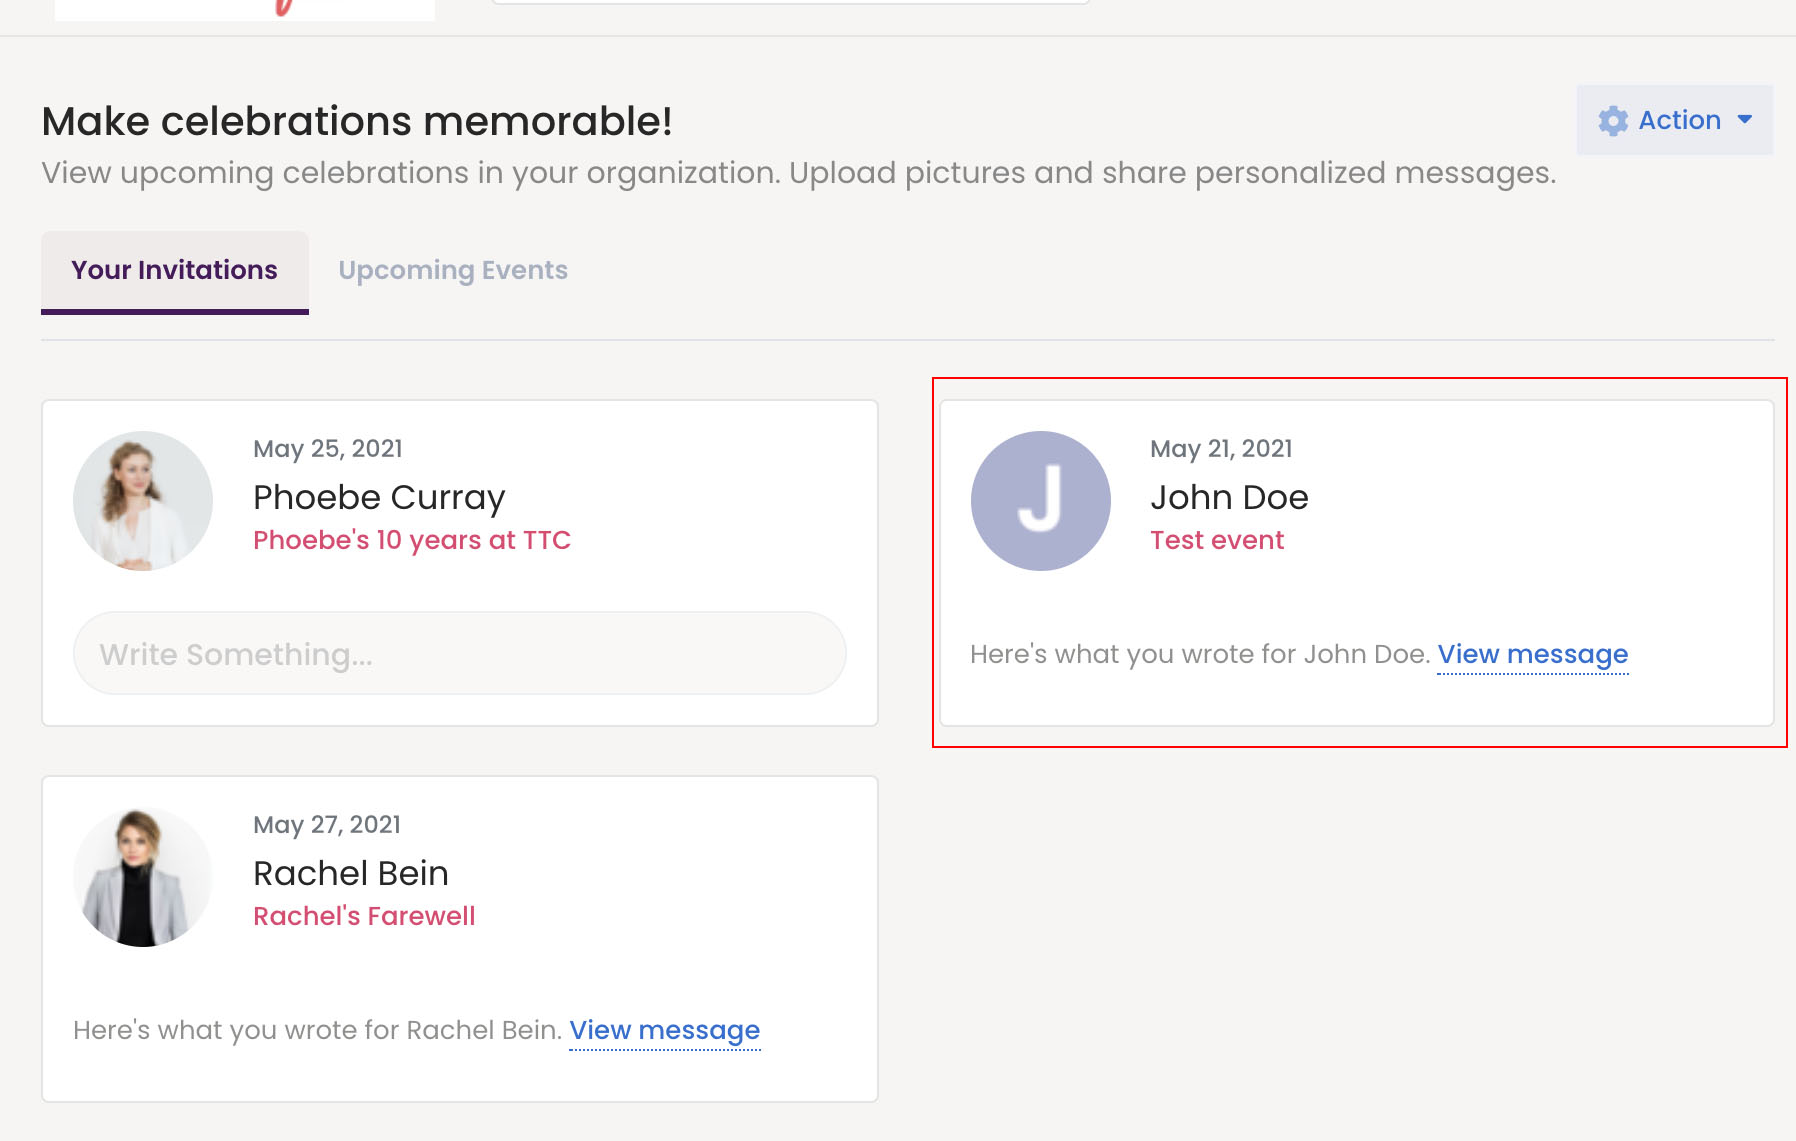
User can submit their testimonial for a colleague by either clicking on the submit button in the mail invite or can go to the Memories section in the platform and check their invitation list.

User can write a personalized message for their colleague along with a photo or a video upload.

Review Submission – User

To review a submission, go to the Memories section in the platform and check your invitation list. Click on View Message to review your submitted testimonial.

Note: The user can review and make changes to their submitted testimonial till 11:59 PM, the night before the event.